

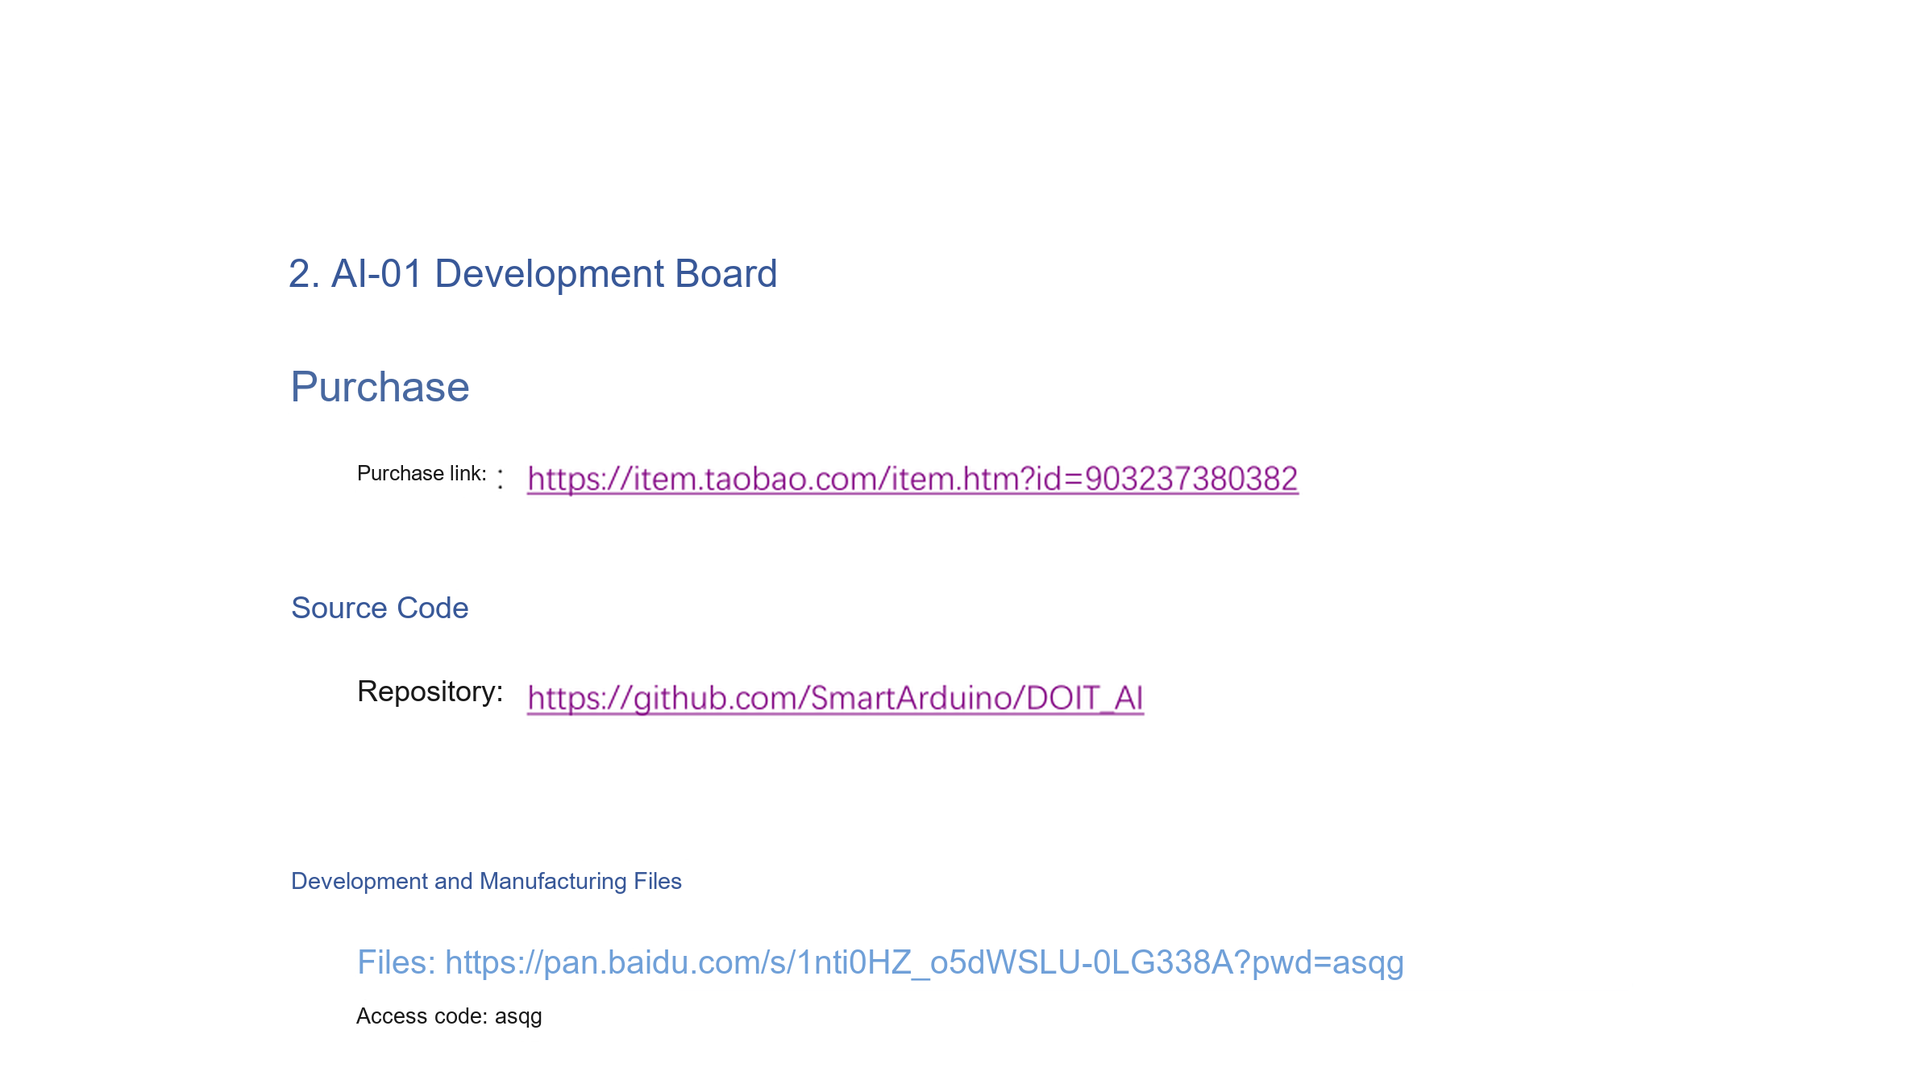

When developing for Xiaozhi AI for the first time, flash Hello World first to verify that the toolchain, serial connection, and dev board all work. Once the basic flow runs, moving on to the voice-conversation project makes it easier to tell an environment fault from a firmware misconfiguration.
This guide follows the DOIT AI Development Handbook v1.0, pages 4–20, using VSCode on Windows and the DOIT AI-01 dev board. Version numbers and interface names match that document; when using other versions, also check the requirements of the project you download.
Prepare the dev board and connection tools
The AI-01 dev board has no onboard USB-to-serial function, so a Type-C cable alone cannot complete the serial flashing procedure described in the documentation. You need the dev board, a data-capable cable, and a USB-to-serial adapter that matches the board’s electrical requirements.
Wire the serial connection according to the board’s wiring diagram: the adapter’s TX goes to the board’s RX, the adapter’s RX to the board’s TX, GND is shared, and Type-C powers the board. Check the pins against the board’s diagram before connecting, to avoid misreading the header orientation. Do not connect the adapter’s power pin before confirming the voltage and supply relationship.
After plugging into the computer, check the devices under “Ports (COM & LPT)” in Device Manager. Unplugging the adapter and plugging it back while watching which COM port disappears and reappears helps identify the target port.
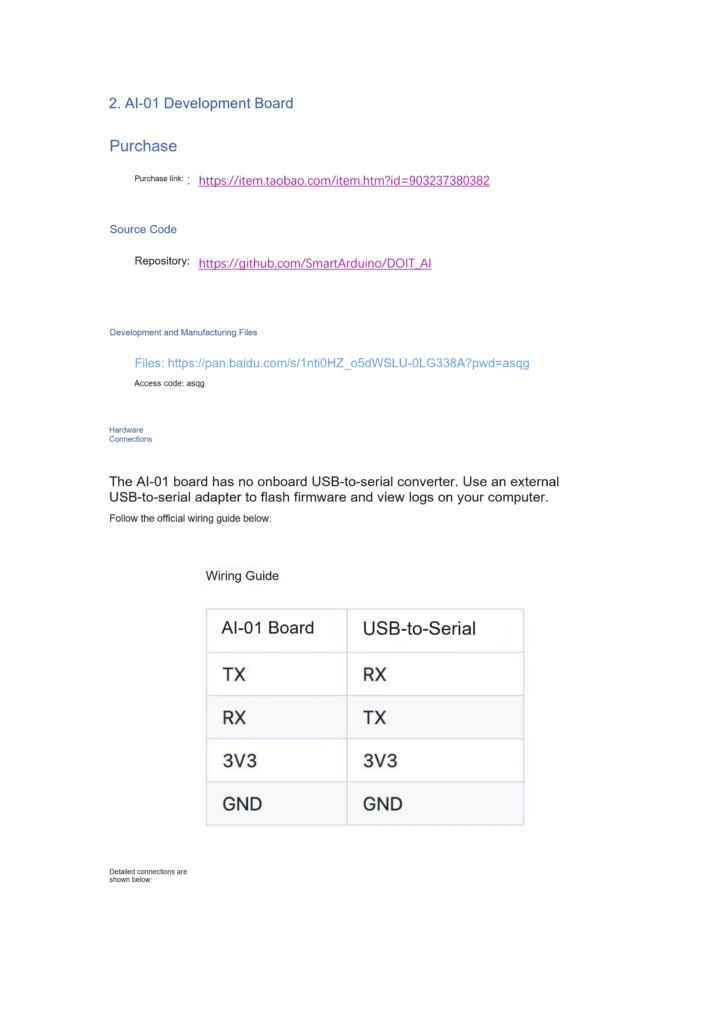
This tutorial uses the Type-C power supply method from page 15 of the handbook — the adapter connects only TX, RX, and GND; do not mix the 3V3 wiring shown in the screenshot with this method.
Step 1: Install the ESP-IDF extension and toolchain
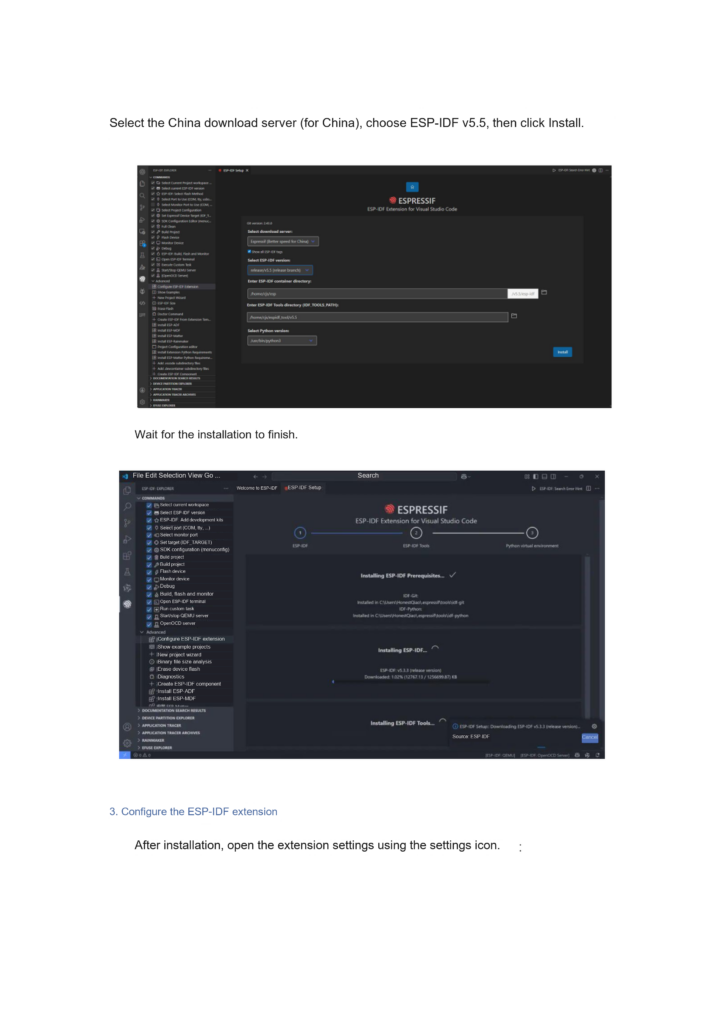
Search for ESP-IDF in the VSCode extensions marketplace and install it. Then open the Espressif extension panel, go to Advanced → “Configure ESP-IDF Extension”, and choose the EXPRESS setup as the handbook describes.
The handbook example uses the China download server and ESP-IDF v5.5; you can adopt this configuration when reproducing the tutorial. If the project’s bundled instructions specify a different version, install per the project’s requirements. After installing the extension, wait for the cross-compiler and other tools to finish preparing before starting a build.
Note the tools directory during installation so you can locate things quickly when troubleshooting later. Do not copy absolute installation paths from another computer.
Step 2: Set the serial port and target chip
In the extension settings, the handbook example sets the flash baud rate to 921600 and the serial monitor baud rate to 74880. These are that example’s settings, not fixed values that apply to every ESP32 project. If the logs show garbled text, check the current firmware’s serial output configuration.
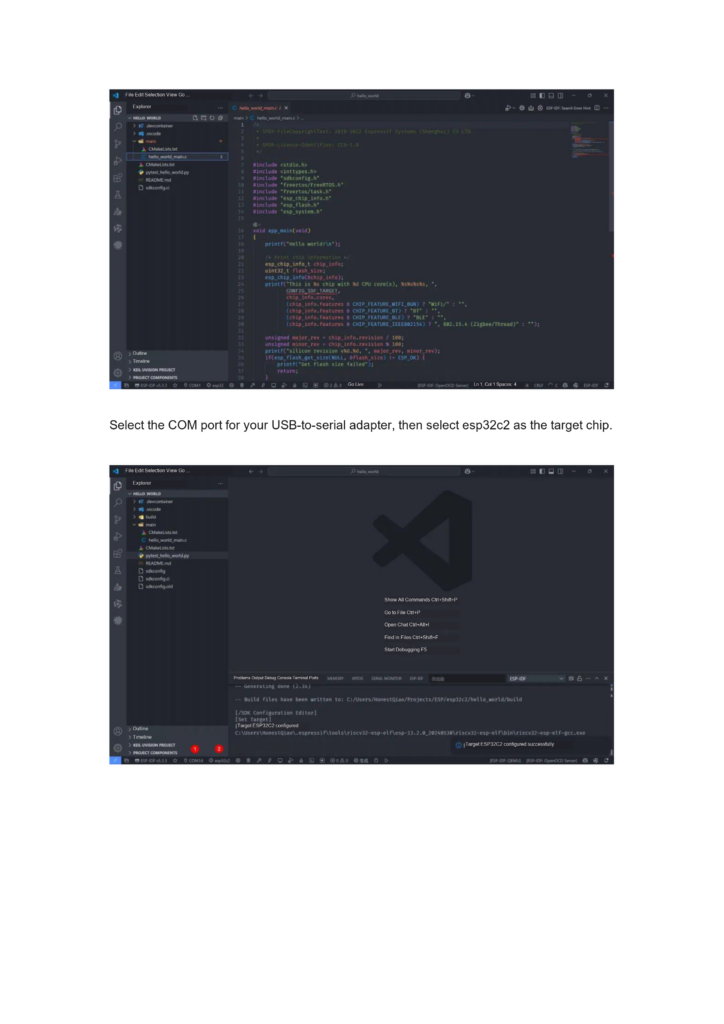
Once inside the project, select the COM port you identified and set the target chip to esp32c2. The AI-01 example does not transfer directly to C3, S3, or C5 boards; after changing boards, check both the chip target and the project board type.
Step 3: Create and build Hello World
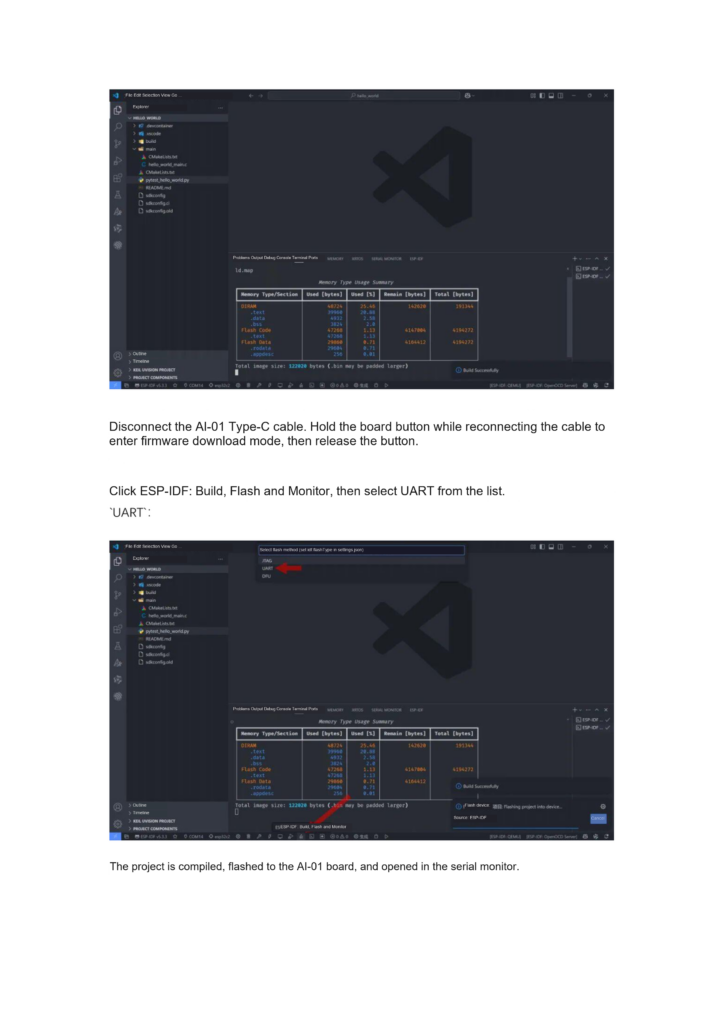
In the ESP-IDF extension’s Advanced area, open the example project list, choose hello_world, and specify where to save the project. After VSCode opens the new project, confirm the port and target chip once more, then build.
A successful build means the toolchain has produced firmware for the current target. Flashing still has to verify the serial wiring and the device’s download mode; confirm the build output finished cleanly before continuing.
If the build fails, keep the first key error message. Check first whether the toolchain is fully installed, whether the extension is using the right environment, and whether the target chip is correct — no need to immediately fiddle with the board’s buttons.
Step 4: Put the AI-01 into download mode
The handbook’s sequence is as follows:
- Disconnect the AI-01’s Type-C power cable.
- Press and hold the board’s button.
- Reconnect the Type-C cable so the board enters download mode.
- Release the button.
- Run “Build, Flash and Monitor” in VSCode and choose UART as in the example.
This procedure is specific to the AI-01. Other DOIT boards may use different USB connections and download methods — check the relevant hardware chapter; the BOOT, EN, or power keys on different boards do not all serve the same purpose.
Step 5: Verify the result
After flashing, unplug and replug the Type-C cable as the handbook instructs, so the AI-01 power-cycles and runs. Only when “Hello World” appears in the serial monitor is the environment and basic flashing verification complete.
When finished, close any monitor task still holding the serial port. The handbook specifically warns that an unterminated output task can interfere with the next flash or monitor session. Before starting a new task, also close other serial debugging software.
After the environment works, switch to the Xiaozhi AI project
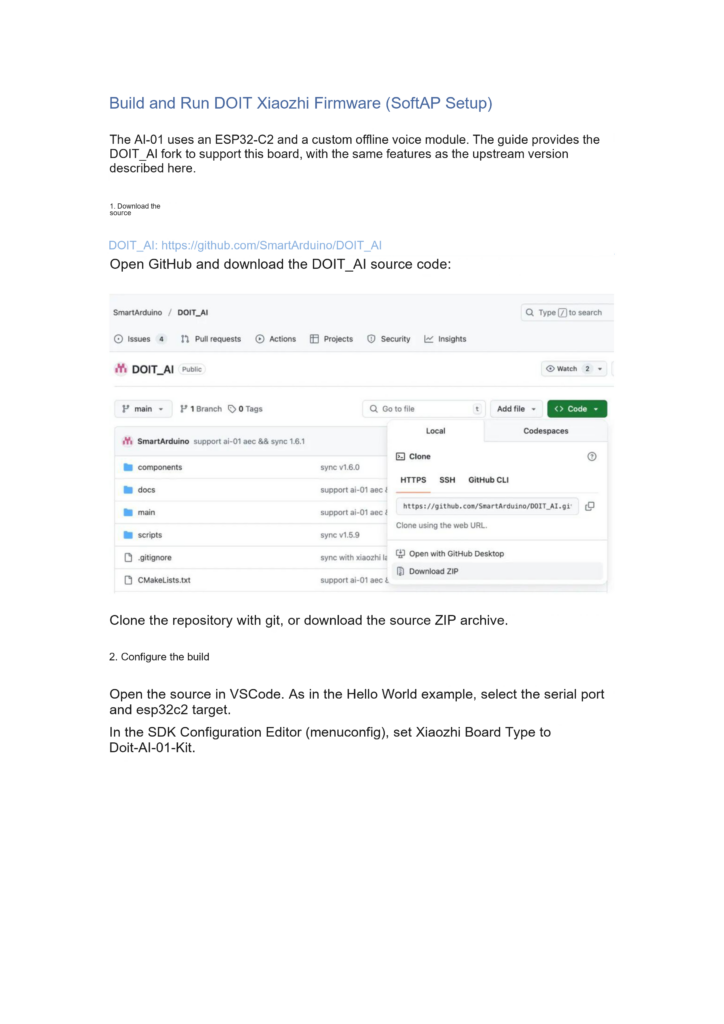
The handbook’s AI-01 example uses DOIT’s DOIT_AI branch. Download that source, open it in VSCode, set the target to esp32c2, select the Doit-AI-01-Kit board type in menuconfig, then build and flash following the board’s procedure.
The AI-01 hardware, the esp32c2 chip target, and the Doit-AI-01-Kit board type must match one another. A correct chip with a wrong board type can still leave peripherals and audio configuration mismatched.
After the voice firmware boots, Wi-Fi provisioning and device binding still need to be completed. A finished Hello World verification does not mean cloud conversation is ready.
Troubleshooting common issues
| Symptom | Check first |
|---|---|
| No COM port appears on the computer | USB-to-serial adapter, drivers, data cable, and USB connection |
| Build fails | ESP-IDF environment, project requirements, and target chip |
| Cannot connect to the device for flashing | Download mode, wiring, power supply, and serial port occupation |
| Flashing succeeds but the board doesn’t run | Whether the board has been power-cycled out of download mode |
| Garbled log output | Whether the monitor baud rate matches the firmware’s output settings |
When reporting a flashing issue to technical support, include the board revision, ESP-IDF version, project version, and the full error context so the fault can be located.
Further reading
- Xiaozhi AI Wi-Fi provisioning tutorial
- Real-time interruption and AEC configuration explained
Sources
- DOIT AI Development Handbook v1.0 (PDF), pages 4–20.
- Project entry point: SmartArduino/DOIT_AI on GitHub. Keep the version you use when reproducing, to avoid mixing menus and instructions from different versions.
发表回复
要发表评论,您必须先登录。